3 practical ways to automate workflows in ArcGIS Pro
You don’t need to be a developer to automate workflows in ArcGIS Pro. In this blog post from Esri Canada instructor Oscar Andrade-Rios, discover which ArcGIS Pro automation option is right for your expertise level and the problem you’re trying to solve.
💡 Key insights
- Your first step when automating ArcGIS Pro workflows should always be to understand your workflow before you attempt to automate it.
- Use ModelBuilder if you want a visual, no-code way of chaining geoprocessing tools together. If you need additional customization, logic or scalability, explore Python. And if you need to guide your colleagues through a consistent process that needs periodic user input, consider Tasks in ArcGIS Pro.
- ArcGIS Pro’s geoprocessing history means you don’t have to build automated workflows from memory. As a bonus, use it to add tools you’ve already run directly to a model.
I often advise my students that when performing workflows in ArcGIS Pro, completing each step manually is a great place to start. Doing so allows you to understand what each tool does, see how the steps connect and confirm that the final results make sense.
But what happens when you need to run that same workflow again next month? Or every quarter? Every year? What if you need to repeat it for 20 different study areas?
Running it manually again is one option. But is it the most efficient one?
This is where automation can make a real difference.
Automating your geographic information system (GIS) workflows can help you save time, improve consistency and create workflows that are easier to repeat and share. And here’s the good news: you don’t need to be a developer to automate workflows in ArcGIS Pro.
ArcGIS Pro provides multiple options for making your workflows more efficient, including ModelBuilder, Python and ArcGIS Pro Tasks. The best choice will depend on your experience, responsibilities and project needs.
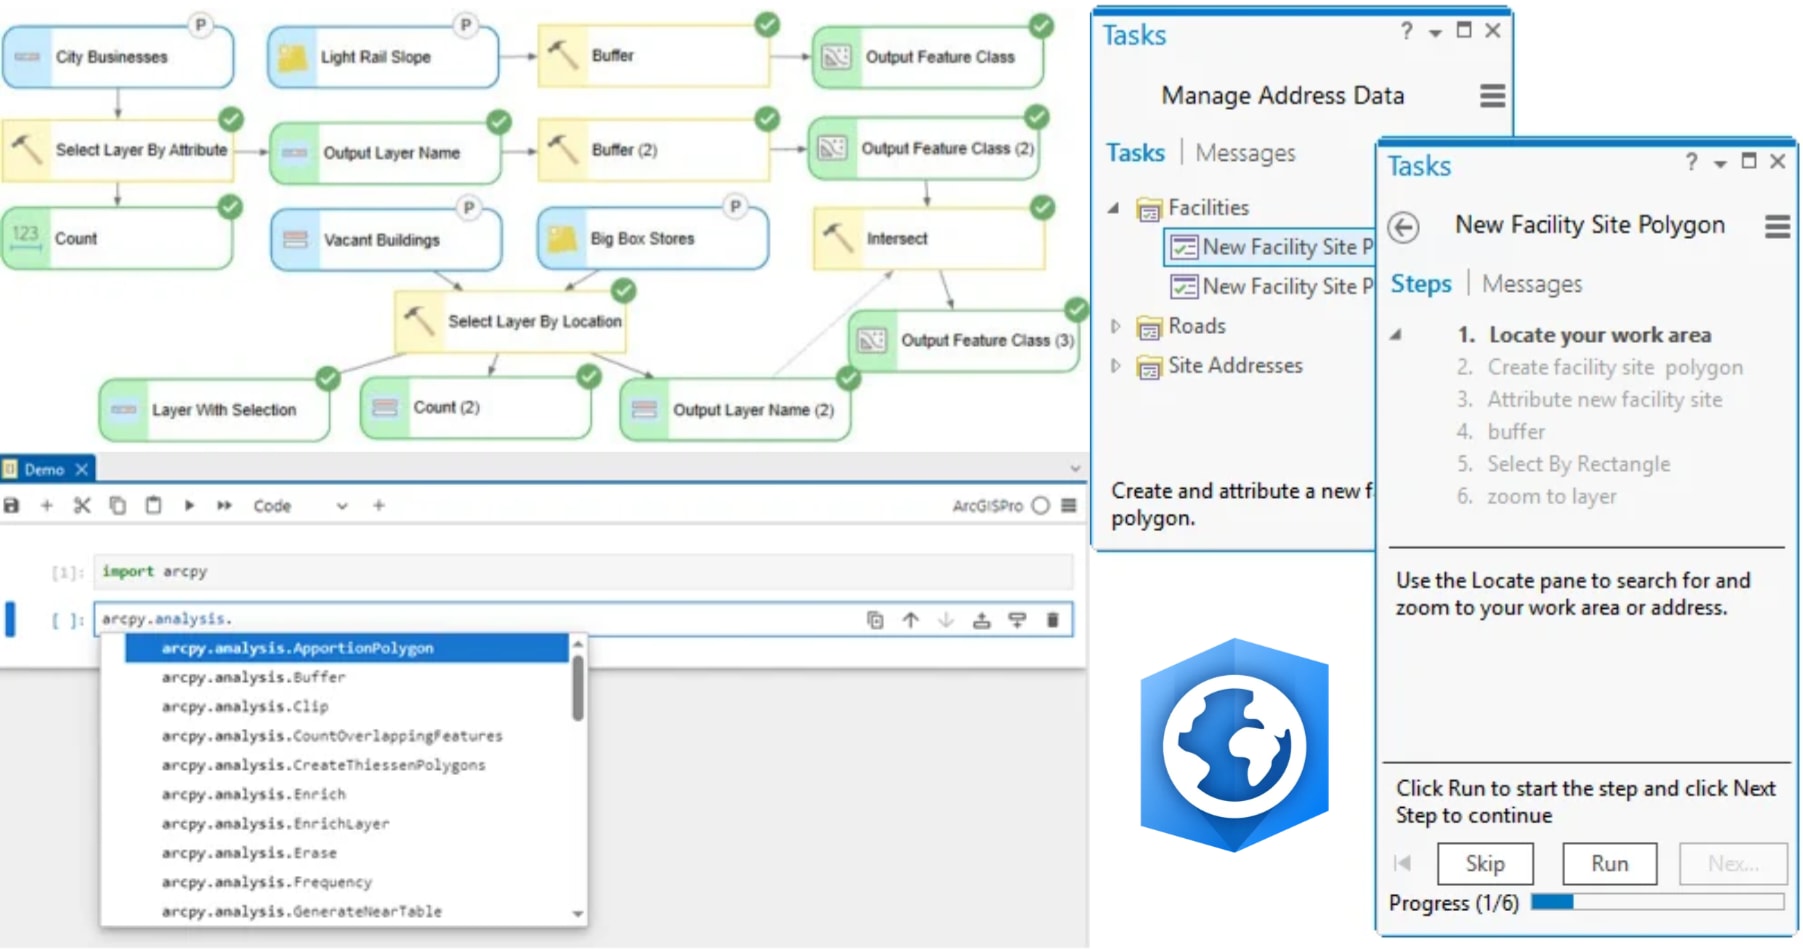
Clockwise, L-R: ModelBuilder, Tasks in ArcGIS Pro and Python are all great options for automating your workflows in ArcGIS Pro.
Let’s look at these three approaches and find out which one could be the right fit for you.
A quick tip before exploring automation: before you automate, understand your workflow
One of the recommendations I frequently share with my students is to do it manually first, then automate it.
It might be tempting to jump directly into ModelBuilder or Python. However, automation works best when you already understand the process you want to automate.
Start by developing a methodology to answer your geographic question. Identify the data and tools you will need and complete the workflow one step at a time.
Once the workflow produces the expected results, then focus on making it more efficient.
💡 Oscar's tip: your Geoprocessing History has already been taking notes
- Every time you run a geoprocessing tool, ArcGIS Pro keeps a record of it in its Geoprocessing History, including the parameters you selected.
- Why is that useful? Because you don’t have to rebuild your automated workflow from memory. You can review the tools and parameters from your successful manual analysis, then use that information as a starting point when reconstructing a workflow in ModelBuilder or generating the corresponding Python commands.
- You’ve already done the thinking. Now ArcGIS Pro can help you repeat the process.
You understand your workflow and have identified the steps you need to repeat. Now, let’s get back to our main question: which ArcGIS Pro automation option is right for you?
Let’s begin with an option that allows you to connect your geoprocessing tools visually, without writing code.
1. Connect your analysis visually by chaining tools with ModelBuilder
You might be asking yourself, “What if I have no coding experience?” That’s fine! ModelBuilder provides a visual environment where you can connect data and geoprocessing tools to create repeatable workflows, with little to no coding required.
Instead of running several tools separately every time you perform an analysis, you can organize them into a model that looks like a workflow diagram. One tool’s output can become the input for the next, allowing you to visualize how each part of your analysis is connected.
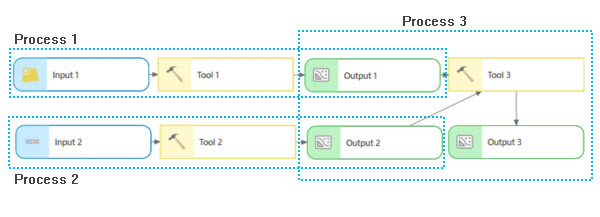
In ModelBuilder, one tool’s output can become the input for the next, allowing you to chain related processes together.
Even better, you don’t always have to build your model from scratch. Remember the Geoprocessing History we discussed earlier? You can use it to add tools you’ve already run to a model, preserving the parameters you previously selected. You can then connect those tools, modify their parameters and continue developing your automated workflow.
This approach is particularly useful for GIS analysts who understand their spatial analysis methodology but want a friendly, visual way to automate it.
Once you are comfortable with the fundamentals, your models can include parameters, iterators, conditional logic, in-memory workspaces and other functionality. You can even incorporate Python scripts when a workflow requires additional customization.
This option may be right for you if:
- You prefer to organize and visualize your workflow as a connected process
- You want to automate with little to no coding
- You regularly repeat a sequence of geoprocessing operations
- You need to process multiple datasets or study areas using the same methodology
- You want to create a process that can be easily reviewed, modified and shared
Interested in learning how to create your own models? Esri Canada’s one-day course ArcGIS Pro: Working with ModelBuilder explores these capabilities. It’s designed for people with previous ArcGIS Pro experience who want to automate, manage and batch-process geoprocessing workflows.
2. Expand your automation options with Python
“What if I want more flexibility and control?” This is where Python can become a powerful addition to your GIS toolkit.
ArcGIS Pro provides several ways to work with Python. You can use the Python window to run commands and test short pieces of code inside a project.
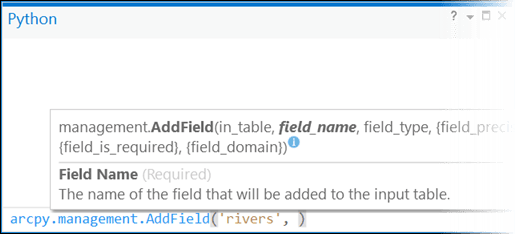
Use the Python window in ArcGIS Pro to run commands and test short pieces of code inside a project.
You can also use ArcGIS Notebooks to combine executable code, maps, visualizations and explanatory content in a notebook-based environment.
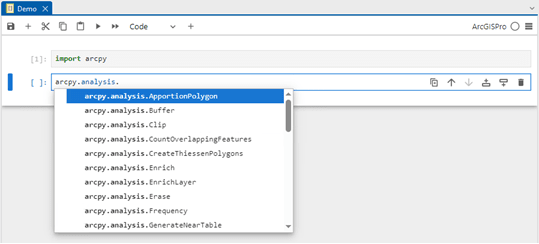
Use ArcGIS Notebooks within ArcGIS Pro to combine executable code, maps, visualizations and more.
Python scripts can help you process multiple datasets, repeat an analysis across different geographic areas, add logic to a workflow or create custom geoprocessing tools that can be shared with other users.
Does that mean you need to begin by writing a long script from a blank page? Not necessarily.
Once again, our friend the Geoprocessing History can help bridge the gap between running tools manually and automating them with Python. After running a geoprocessing tool, you can review the Python command used by ArcGIS Pro and use it as a reference for your own code.
This allows you to connect something familiar, a geoprocessing tool you have already used, with its Python equivalent. Start with one command, understand how it works and continue building from there.
This option may be right for you if:
- You want greater flexibility and control when designing your workflows
- You need to process many datasets, features or study areas
- You want to add customized logic to your analysis
- You want to create scripts or tools that can be reused and shared
- You are ready to build or expand your coding skills
If you’re new to coding and want to explore Python automation, Esri Canada’s Getting Started with Python course provides a foundation in Python—no previous programming experience required. Or, if you already know Python, our more advanced course Creating Python Scripts for ArcGIS focuses on applying that knowledge to GIS workflows.
3. Guide others through a workflow with ArcGIS Pro Tasks
“But what if my workflow can’t be completely automated?”
Some GIS workflows combine geoprocessing tools with steps that require user input. Someone may need to inspect a map, select features, edit information, review a result or make a decision before continuing.
In situations like these, ArcGIS Pro Tasks can provide a guided, step-by-step experience that brings the entire workflow together.
Tasks can be used to document and standardize a business process directly within ArcGIS Pro. Each step can include instructions and can be configured to open the commands, geoprocessing tools or views required at that point in the workflow. This makes Tasks particularly valuable when multiple people need to run the same process.
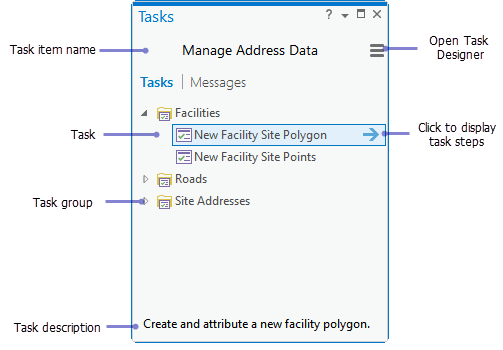
Use Tasks in ArcGIS Pro to document and standardize business processes directly within ArcGIS Pro. Similar Tasks can be grouped together and their steps reviewed.
For example, imagine you’re a GIS manager who needs several team members to update a dataset. The process includes locating the correct area, selecting a specific type of feature, editing its attributes, validating the changes and saving the results. Instead of sharing a separate document and asking each person to interpret and follow the instructions, you could create a Task that guides users through the entire process directly in ArcGIS Pro. This will help your team members know what to do, which tools to use and when to move to the next step.
And Tasks are not limited to new ArcGIS Pro users. They can help people at different experience levels follow an established process, complete procedures they perform less frequently and apply organizational best practices.
This option may be right for you if:
- Your workflow includes both automated and manual steps
- You want multiple people to follow a consistent process
- You support colleagues with different levels of ArcGIS Pro experience
- You want to keep workflow instructions inside ArcGIS Pro
- You need to share organizational procedures or best practices
- You want to make established workflows easier for others to follow
If you’d like a structured introduction to creating guided workflows using Tasks, Esri Canada’s Optimizing GIS Workflows with Tasks in ArcGIS Pro course will introduce you to using, designing, creating and sharing Tasks. It also explores techniques for streamlining organizational GIS workflows and creating processes that others can follow consistently.
Which option should you choose?
You do not have to stick with one approach forever, and these options—ModelBuilder, Python and Tasks in ArcGIS Pro—are not mutually exclusive.
A workflow might begin as a manual process, become a model and eventually include a Python script. That model or script could then become part of a task that guides someone through a larger business process.
Start by asking yourself:
- Do I want a visual, no-code way to connect geoprocessing tools? Start with ModelBuilder.
- Do I need additional customization, logic or scalability? Explore Python.
- Do I need to guide people through a consistent process that includes user interaction? Use Tasks.
The best option depends not only on the technology, but also on your experience, the people who will use the workflow and the problem you are trying to solve. You may be closer to automating your next GIS project than you think!
To stay informed about all the latest training opportunities at Esri Canada, visit Esri Canada’s Communication Preference Centre and select the “Training” checkbox to get a monthly roundup straight to your inbox.